- Add a Monitor to the Dashboard collection...
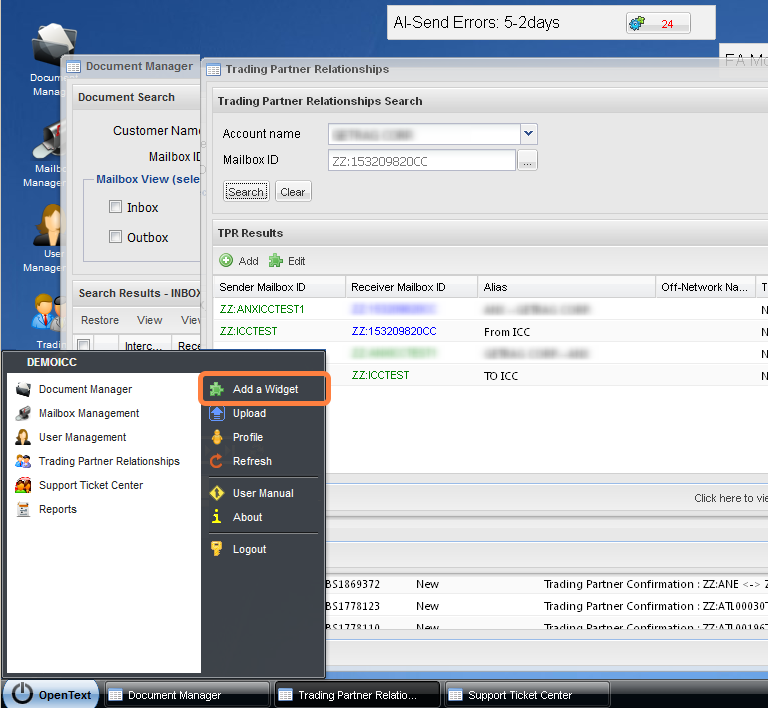
- Click the OpenText Start Button at the bottom left
- Click the "Add a Widget" link to add a Dashboard Monitor
Choose a Dashboard Monitor
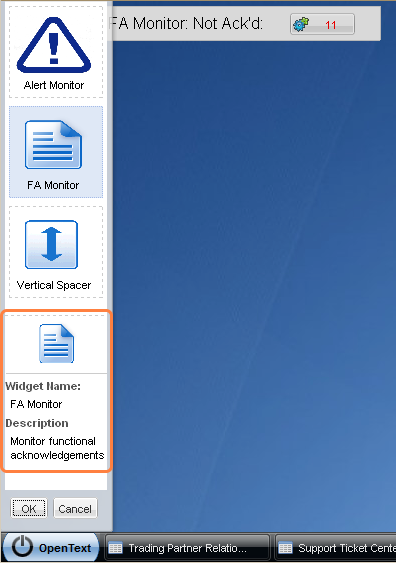
- The open windows you see in the previous example are temporarily minimized while you are interacting with the Dashboard Monitor Chooser. This is to allow you to see all the monitors already configured.
- The Widget Chooser displays along the left border.
- The Chooser window is modal. You cannot interact with any other application components.
- You may click each monitor icon to display the title and short description about what each Monitor does at the bottom of the chooser bar [highlighted in orange]. In the example above the "FA Monitor" is selected.
- Click Cancel to close the Chooser without adding a new Monitor [all previously un-minimized windows will be restored].
- Single-click a Monitor followed by "OK", or double-click a Monitor, to add it to the Desktop's Dashboard.
Provide an initial configuration of the Monitor when it is added
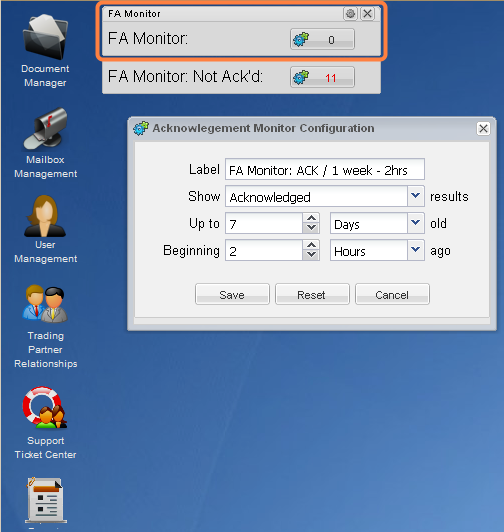
- The Chooser closes and the configuration panel for a newly added Monitor is displayed when added to the Dashboard.
- NOTICE: A newly added Monitor with the title-bar showing is always added at the top of the left-most column of the Dashboard. Once you are done configuring it, you can move it to any position you prefer. The example image above illustrates the existing "FA Monitor: Not Ack'd" that was already there is pushed-down by the newly added Monitor.
- Add a semantically descriptive Label that represents the way the monitor is configured. This example suffixed the default label with "ACK / 1 week - 2hrs" to describe the configuration options; you can remove or change the default label text as well.
- Change the configuration values to what is needed, then click "Save". The Configuration dialog-box will close. (Each Monitor's documentation page will go into detail about the configuration fields that are unique to it.)
The Desktop is returned to normal
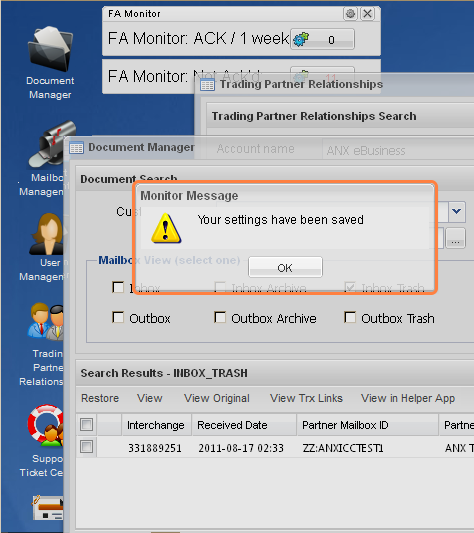
- Once the Configuration dialog-box is closed a confirmation alert is shown [highlighted in orange] and the Desktop is returned to normal. Click "OK" to close the confirmation dialog.
- You may double-click the Monitor to pin it there, or drag and drop it to a different location on the screen over or under other Widgets.
- Double-click toggles edit-mode | pinned-mode; which shows and hides the title bar and action buttons respectively.
- When in edit-mode you may click the 'X' to remove the Monitor from the Dashboard, or click the gear to reopen and reconfigure the Monitor as needed.